AUTOMATIC1111 Reviews:automatic 1111 stable diffusion
ABOUT AUTOMATIC1111
AUTOMATIC1111 is one of the most popular web interfaces for running Stable Diffusion. It is based on the Gradio library and can be installed fairly easily on both Windows and Linux operating systems, although it does require a bit of Python and GitHub knowledge. AUTOMATIC1111 is personally my favorite Stable Diffusion interface to use, the number of settings are a bit overwhelming but they allow you to control the image generation very precisely. There’s even extensions which can be added for more customization and features, such as Dynamic Prompts or Deforum, a tool for creating animation and videos straight from Stable Diffusion. The easiest way to install AUTOMATIC1111 is to follow our installation guide.
Stable Diffusion web UI (AUTOMATIC1111 or A1111 for short) is the de facto GUI for advanced users. Thanks to the passionate community, most new features come to this free Stable Diffusion GUI first. But it is not the easiest software to use. Documentation is lacking. The extensive list of features it offers can be intimidating.
Download and install Web UI
You can use Stable Diffusion Web UI on Windows, Mac, or Google Colab.
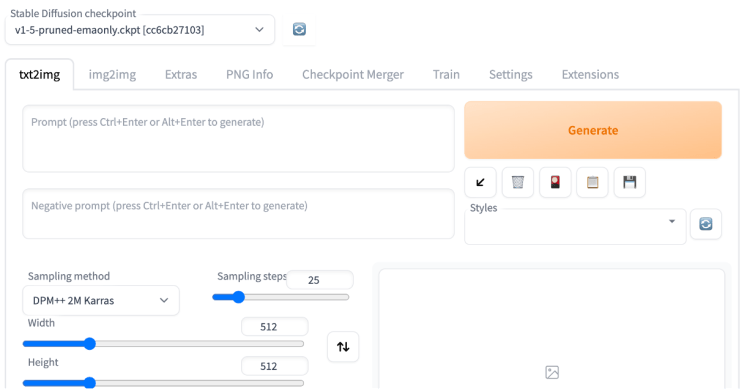
Text-to-image tab
You will see the txt2img tab when you first start the GUI. This tab does the most basic function of Stable Diffusion: turning a text prompt into images.
Basic usage
These are the settings you may want to change if this is your first time using AUTOMATIC1111.
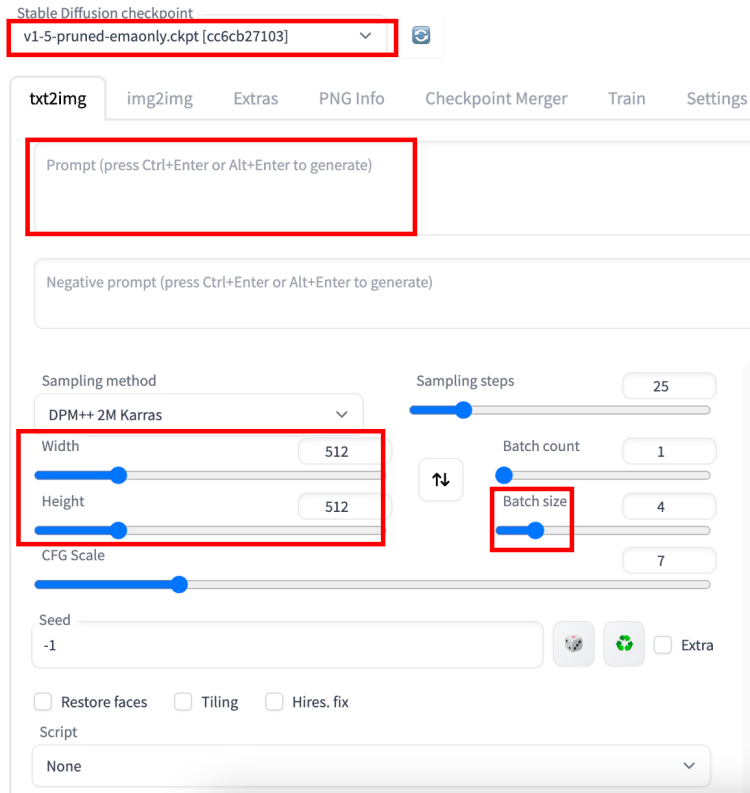
Stable Diffusion Checkpoint: Select the model you want to you. First-time users can use the v1.5 base model.
Prompt: Describe what you want to see in the images. Below is an example. See the complete guide for prompt building for a tutorial.
A surrealist painting of a cat by Salvador Dali
Width and height: The size of the output image. You should set at least one side to 512 pixels when using a v1 model. For example, set the width to 512 and the height to 768 for a portrait image with a 2:3 aspect ratio.
Batch size: Number of images to be generated each time. You want to generate at least a few when testing a prompt because each one will differ.
Finally, hit the Generate button. After a short wait, you will get your images!
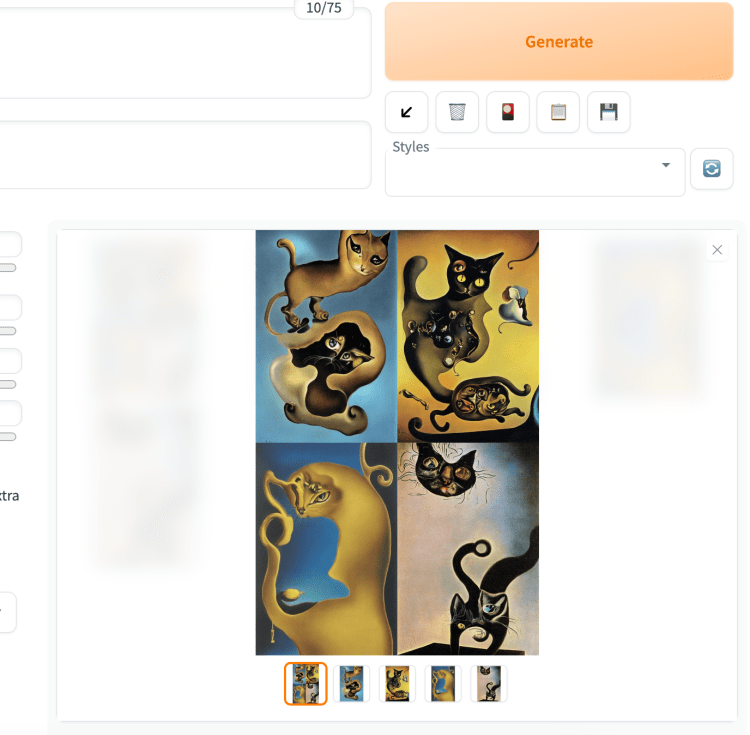
By default, you will get an additional image of composite thumbnails.
You can save an image to your local storage. First, select the image using the thumbnails below the main image canvas. Right-click the image to bring up the context menu. You should have options to save the image or copy the image to the clipboard.
That’s all you need to know for the basics! The rest of this section explains each function in more detail.
Image generation parameters
Stable Diffusion checkpoint is a dropdown menu for selecting models. You need to put model files in the folder stable-diffusion-webui > models > Stable-diffusion. See more about installing models.
The refresh button next to the dropdown menu is for refreshing the list of models. It is used when you have just put a new model in the model folder and wish to update the list.
Prompt text box: Put what you want to see in the images. Be detailed and specific. Use some try-and-true keywords. You can find a short list here or a more extensive list in the prompt generator.
Negative Prompt text box: Put what you don’t want to see. You should use a negative prompt when using v2 models. You can use a universal negative prompt. See this article for details.
Sampling method: The algorithm for the denoising process. I use DPM++ 2M Karras because it balances speed and quality well. See this section for more details. You may want to avoid any ancestral samplers (The ones with an a) because their images are unstable even at large sampling steps. This made tweaking the image difficult.
Sampling steps: Number of sampling steps for the denoising process. The more the better, but it also takes longer. 25 steps work for most cases.
Width and height: The size of the output image. You should set at least one side to 512 pixels for v1 models. For example, set the width to 512 and the height to 768 for a portrait image with a 2:3 aspect ratio. Set at least one side to 768 when using the v2-768px model.
Batch count: Number of times you run the image generation pipeline.
Batch size: Number of images to generate each time you run the pipeline.
The total number of images generated equals the batch count times the batch size. You would usually change the batch size because it is faster. You will only change the batch count if you run into memory issues.
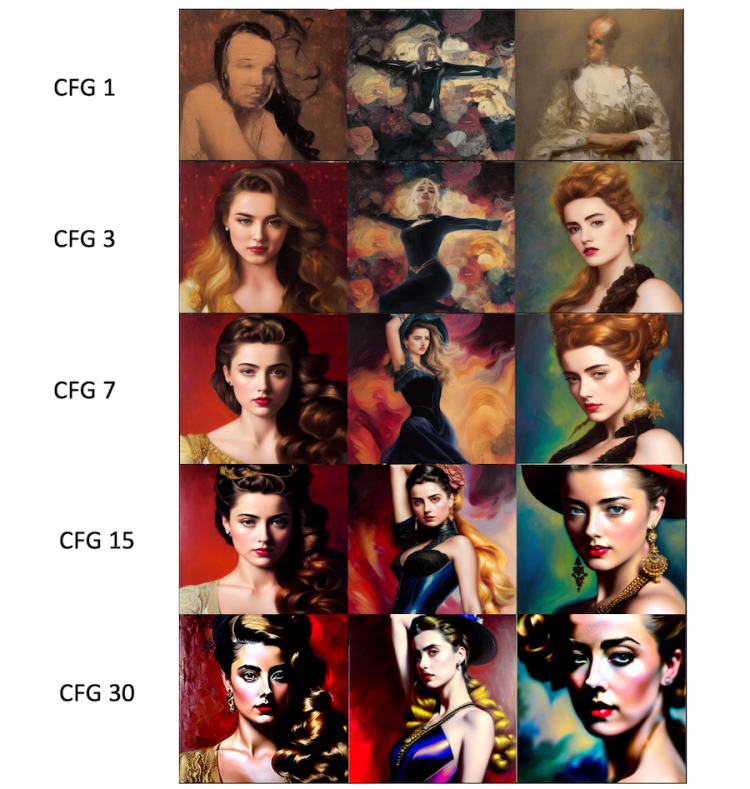
CFG scale: Classifier Free Guidance scale is a parameter to control how much the model should respect your prompt.
1 – Mostly ignore your prompt.
3 – Be more creative.
7 – A good balance between following the prompt and freedom.
15 – Adhere more to the prompt.
30 – Strictly follow the prompt.
The images below show the effect of changing CFG with fixed seed values. You don’t want to set CFG values too high or too low. Stable Diffusion will ignore your prompt if the CFG value is too low. The color of the images will be saturated when it is too high.
AUTOMATIC1111 FAQ
What is AUTOMATIC1111?
Automatic1111 App is a web browser interface for Stable Diffusion using cloud GPUs. Run, train and deploy Stable Diffusion models in one click with no setup required on your web browser. Thousands of user-contributed models and extensions for AI art creation.
What is AUTOMATIC1111 Stable Diffusion?
Stable Diffusion web UI (AUTOMATIC1111 or A1111 for short) is the de facto GUI for advanced users. Thanks to the passionate community, most new features come to this free Stable Diffusion GUI first. But it is not the easiest software to use. Documentation is lacking.
How to install AUTOMATIC1111 locally?
Installation steps
- Step 1: Install python. You will need Python 3.10.6. ( …
- Step 2: Install git. Git is a code repository management system. …
- Step 3: Clone web-ui. This step downloads the Stable Diffusion software (AUTOMATIC1111). …
- Step 4: Download a model file. …
- Step 5: Run webui.
What is Xformers AUTOMATIC1111?
The Xformers library provides an optional method to accelerate image generation. This enhancement is exclusively available for NVIDIA GPUs, optimizing image generation and reducing VRAM usage. Older versions below 0.0.20 will produce non-deterministic results.
How to run AUTOMATIC1111 on AMD GPU?
Install AUTOMATIC1111 Stable Diffusion WebUI on AMD GPU
- Step 1: Install Git. Go to the official Git website to download Git. …
- Step 2: Install Python. Install Python from the official site. …
- Step 3: Download lshqqytiger’s Version of AUTOMATIC1111 WebUI. …
- Step 4: Run the WebUI. …
- Step 5: Testing Our First Prompt.
What is Stable Diffusion automatic 1111?

Stable Diffusion web UI (AUTOMATIC1111 or A1111 for short) is the de facto GUI for advanced users. Thanks to the passionate community, most new features come to this free Stable Diffusion GUI first. But it is not the easiest software to use. Documentation is lacking.
What is the best web UI for Stable Diffusion?

Automatic1111’s Stable Diffusion Web UI is a highly popular web user interface for accessing Stable Diffusion’s AI models without the need for coding. As the leading browser-based interface using the Gradio library, it comes with a variety of features to improve the user experience and produce excellent results.